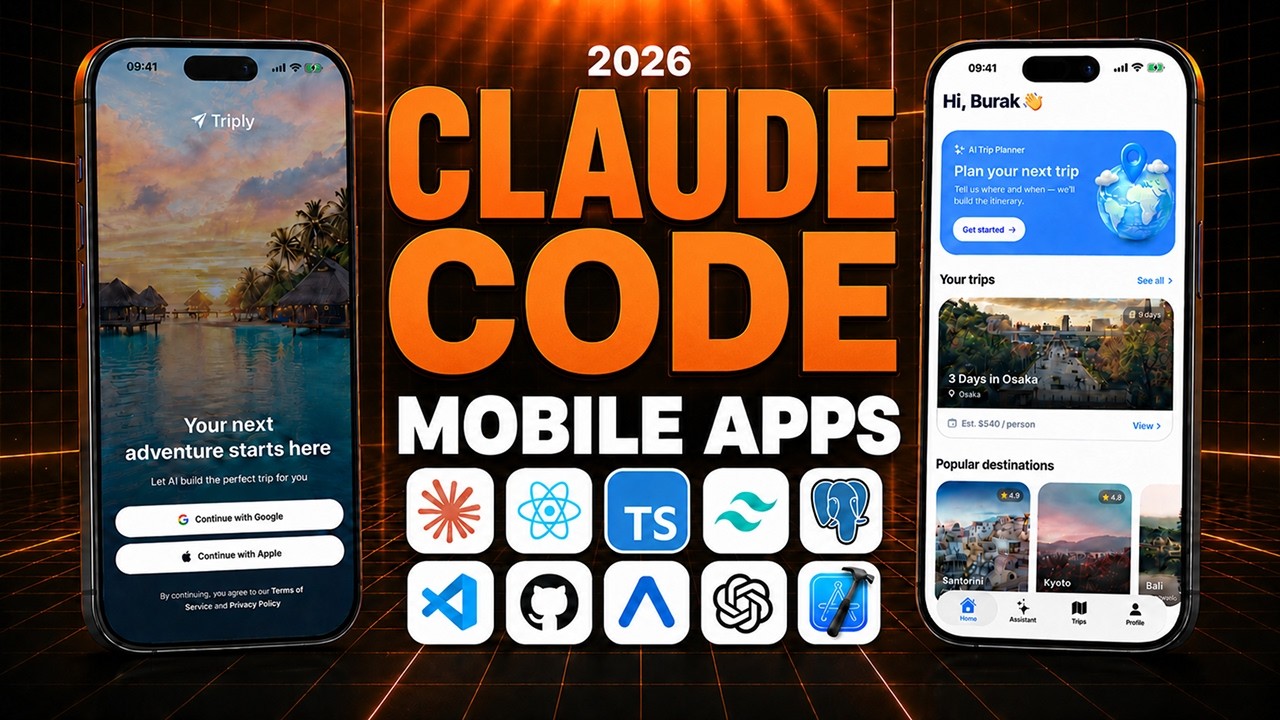
🎯 What You'll Build
"If you want to build and launch a real mobile application using AI, this tutorial is for you. We are not building some random demo application — we are building a modern AI trip planner that you can run on your actual phone, share with your friends, and even use as a real product." 0:00
The instructor's credibility anchor: "I built and deployed my own mobile app to the App Store in only 14 days — a calorie tracker called BulkyAI — and got my first customer 5 days after launch. That's the proof." 0:30
| Feature | What it does |
|---|---|
| Authentication | Google + Apple sign-in via Clerk (email disabled; you can add more providers) |
| 4 Native Tabs | Home, AI Assistant, Trips, Profile — with iOS liquid glass effect |
| AI Trip Generation | Location, dates, budget, travelers, interests, pace → OpenAI generates a full trip in the background |
| Day-by-day itinerary | Places, activities, budget breakdown, hotel suggestions, and an interactive map |
| AI Assistant | Chat to modify trips ("make it more relaxed", "add local food", "lower budget") or general travel questions |
| Trips tab | Every generated trip, viewable and deletable |
| Profile | Account details, logout, delete account (full DB cleanup) |
| Rate App button | App Store review prompt |
| Legal pages | Landing page + privacy policy + terms + support (deployed on Cloudflare) |
🧰 The Tech Stack
"We're using some of the best tools out there." All of them have free tiers — you don't need to pay anything to follow along. 4:46
| Tool | Role | Key note |
|---|---|---|
| React Native + Expo | Mobile framework | "Genuinely one of the best ways to get started" — the exact stack BulkyAI used |
| Clerk | Authentication | "Pretty easy to integrate, production-ready" — Google/Apple/email SSO |
| Neon | Postgres database | Cloud-hosted, no server management |
| Drizzle | ORM | Chosen over Prisma ("Drizzle is just going to be my option") |
| Inngest | Background jobs | Trip generation + experiments (A/B model routing) |
| Sentry | Error tracking & monitoring | Real-user errors → email alerts → fix before others hit it |
| ImageKit | Image optimization | Compresses/optimizes cover images for speed |
| CodeRabbit | AI code review | Scans codebase, flags issues + exact fixes |
| Unsplash | Place images | Real city photos by location (Tokyo → Tokyo, not a beach) |
| OpenAI | Trip generation model | Cheapest "mini" model used for V1 (Gemini free alternative) |
| NativeWind | Styling | "Tailwind for React Native" — v4 stable over v5 pre-release |
🔄 The Structured Workflow
"Before we write a single line of code, first we plan and describe our entire project to AI." This is the core loop that repeats for every feature. 11:26
- Plan — define idea, goals, features, pages, user flow, tech stack. "Spend the first day on the plan. If you don't know what you're building, how would AI know?"
- Design — use a structured prompt to generate the UI: screens, layouts, visual style, and a design system.
- Break into features — one screen at a time (auth → home → assistant → trips → profile).
- Implement — build one feature with Claude Code.
- Test manually — you check it yourself first (run the app, click everything).
- AI code review — run CodeRabbit to catch security/correctness issues you and Claude both missed.
- Fix → loop — if there are issues, go through the fix loop until clean.
- Commit — save progress via a feature branch → PR → merge to main.
📝 Phase 0 — Planning (Plan Mode)
Claude Code has modes: plan mode (plan a feature or project), edit automatically (edit files without asking), and ask before edits (permission before every action — "the one to start with, then switch to edit automatically once you understand it"). 17:50
The Plan-Mode Prompt (project-agnostic)
The goal: "AI doesn't guess any feature, but instead asks me all kinds of questions." Example questions it asked: which AI model generates trips? separate Node backend or Expo Router API routes? poll DB vs push notification? what does a generated trip contain? place photos or text-only? real map? ORM choice? generation limits? platform scope (iOS only)? ImageKit role? inputs on the form? what does a returning user see? 24:30
🔑 Environment Variables
"What I'd like to do is create the .env file from the start — put all the environment variables so AI can implement everything instead of waiting for us." He provides a .env.example file in the source code. 41:20
| Variable | Source | Count |
|---|---|---|
| Clerk | Clerk dashboard → API keys | 3 (publishable, secret, webhook signing) |
| Database | Neon dashboard → Connect | 1 (URL, no quotes) |
| OpenAI | platform.openai.com → API keys | 1 (or Gemini for free) |
| Unsplash | unsplash.com/developers → new app | 2 (access + secret) |
| Inngest | Inngest dashboard → keys | 2 (signing + event; dev needs none) |
| ImageKit | ImageKit dashboard → developer options | 3 (URL endpoint, public, private) |
| Sentry | Sentry dashboard → auth token | 1 |
.env to .gitignore "so we don't push our secrets to GitHub." And always copy the value without quotes from Neon ("only get the value, don't include the quotes"). 41:45
🌿 The Git + PR Workflow
"For every single feature, instead of committing directly, we create a separate branch. Implement it, ask AI to review it, add commits until fixed, then push to main via a pull request. This is the workflow you'd follow in a real company." 45:20
- Create a feature branch (e.g.
authentication,auth-db-sync,create-trip) - Stage everything + get an AI-generated commit message
- Publish the branch → create the pull request
- CodeRabbit reviews the PR (scans every changed file — one PR was 43 files, another 12,000 lines)
- Fix valid suggestions (skip the ones you disagree with) → commit under the same branch
- Merge the PR → switch to master → sync latest changes
🎨 UI Design with GPT Image
Design happens before code. He uses GPT Image (any image model works: Gemini, etc.) with prompts he provides as links. "You design every screen one by one, then you give the design system — typography, color palette, style, components, and the goal of the app." 49:30
@filename. Then paste the resulting prompt into GPT and add "aspect ratio 16:9" for horizontal images. 51:30
design/ folder. He used it for the home screen, trip detail, and even logos ("generate a grid of nine logos… actually a world icon… upscale this without text, transparent background"). 56:10
auth-screen-background.png, world.png, trip-loading-screen). 52:10
📄 agents.md vs claude.md
Two plain-markdown instruction files auto-loaded into the AI's context at session start. 71:20
| File | Who reads it | Purpose |
|---|---|---|
claude.md | Claude Code only | Claude-specific instructions |
agents.md | All AI coding tools (Cursor, Copilot, Codex, Gemini CLI, Claude) | Agent-agnostic project instructions |
agents.md (agent-agnostic), and in claude.md put a single reference: "read the agents.md file for initial instructions." 72:20
className not inline styles), and hard rules — e.g. "always use native tabs, never JavaScript tabs" and "never run the application by yourself, I'm already running it in a separate terminal." Don't know what to put? Ask Claude: "depending on my project, what should I have in agents.md?" 73:20
🔐 Auth Screen (Clerk)
Before coding, the app is bootstrapped with npx create-expo-app@latest . (SDK 56 at recording time), then npm run reset-project to delete the template ("No, just delete" when it offers to move files to an example folder). 13:50
Clerk Skills
"Skills are installable packages that give AI coding agents specialized knowledge about Clerk — once installed, our agent can help add authentication, manage orgs, sync users, and more." Install via the Clerk docs → "Claude skills" → copy the command, or paste the markdown and say "install the skills needed for this project." Claude skipped 17 of ~20 as not applying to this project. 56:50
Expo Dev Client vs Expo Go
npx expo run ios (or android). This is what BulkyAI used. 59:30
NativeWind + Sentry setup
Paste NativeWind docs → "read the entire documentation step by step and implement it correctly, then double-check." For Sentry: create a project, run the Sentry wizard CLI (or copy the docs → "set up Sentry in my project"), and add the auth token from Sentry → Organization tokens. 64:20
Clerk Dashboard
Create application "triply tutorial" → disable email, enable Google + Apple (free plan = 3 providers) → grab env vars from the Expo quick-start → tell Claude "I have the environment variables for Clerk, implement Google and Apple auth, make sure to read the skills since they're the official documentation." Test: sign in with Google → redirected to home screen with first name + email → verify the user appears in the Clerk dashboard. 80:20
useSSO hook — "everything is coming from Clerk Skills. If Apple fails, screenshot it, paste to Claude, and say 'Google works but Apple doesn't — fix it.'" 84:20
🔁 The Verify Loop
The single most important pattern in the course. Every screen is built by putting Claude into a self-comparing loop. 62:10
- Implement the feature / UI design
- Tell Claude to take a screenshot from the simulator
- Compare it to the reference design image
- If not identical → Claude gives itself feedback and rebuilds (repeat)
- When ~80-90% identical (never 100% — it's AI), jump into code and tweak manually
index.tsx, changed the value to 58). "AI gets it 80-90% — then you finish it." 102:30
📡 Webhooks & User Sync
The critical concept for AI/vibe coders: "a user signs up via Clerk and is stored in the Clerk dashboard — but we also have a database. How do we save the user there too? The solution is webhooks." 92:00
- Clerk dashboard → Configure → Developers → Webhooks → Add endpoint
- URL = ngrok domain +
/api/webhooks/clerk - Subscribe to
user.created,user.updated,user.deleted - Copy the signing secret → paste into
.env(clerk_webhook_signing_secret) - Inngest runs a "sync-user" background job that upserts the user into Neon
🔌 ngrok + Context7
Two utilities that make the webhook workflow possible. 95:50
| Tool | What it does | Why you need it |
|---|---|---|
| ngrok | Gives a production-ready public URL for your local API | Webhooks need a real URL, not localhost — Clerk can't reach your laptop otherwise. Free plan = 1 URL. |
| Context7 (by Upstash) | Feeds up-to-date documentation to your LLM | "One of the best tools out there" — always-fresh docs for any tool. Append "use Context7" to a prompt. |
⚙️ Inngest Background Jobs
The trip generation runs async — the mobile app polls the DB for status while Inngest generates the trip in the background. 107:10
npm run inngest (or the command Claude gives). In production you need two keys (signing + event), but "in development you don't need a key." 99:50
user.created and user.deleted runs in real time. 107:30
🧭 Native Tabs (Liquid Glass)
"Native tabs are the feature that gives us the iOS liquid glass effect." Four tabs: Home, Assistant, Trips, Profile. 115:00
index.tsx fix when Claude couldn't push it right.) 121:00
🗺️ Trip Generation
The core feature. The "get started" form collects place, dates, budget (budget-friendly/comfort/luxury), travelers, interests, and pace. Then OpenAI generates the trip in the background. 124:00
triply/covers folder auto-created by Claude. 128:20
🐛 Sentry Deep Dive
Why Sentry? "When your users face errors, 99% of the time they'll just delete the app and leave a one-star review — 'app doesn't work' — and you have no idea which feature." Sentry is "your app's watchtower." 159:40
| Feature | What it does |
|---|---|
| Error catching | Automatically catches errors and reports crashes |
| Sentry Logs | "Console.log, but structured" — searchable, persisted in the cloud (vs console.log which dies when the app closes) |
| Session Replays | A video recording of what your user saw when the error happened |
| Traces | Performance: throughput + latency, bottlenecks |
| AI Agent Monitoring | Tracks token usage, latency, tool usage, error rates of your AI calls — "fully connected to your logs, errors, traces" |
| Alerts | Real-time — email by default, or Slack/Discord for teams |
debug, error, fatal, info, trace, warning. Error under catch, info under if ("let you know everything is done"). 167:20
mobileReplayIntegration in the root layout. He set maskAllImages: false and maskAllText: false so images/text show in the dashboard. 170:20
💬 Assistant + Streaming
Build the assistant screen with the same verify loop ("attach the design, put yourself into the loop, screenshot → compare → until identical"). First try nearly nailed it — "just a small issue: extra spacing. Delete it." 172:40
ReadableStream and stream: true. Then: "reset the input as soon as we send the message." 174:20
assistant_messages table (distinct from chat_messages used for trip refinement). 180:40
🧪 Inngest Experiments
"A situation every developer hits: your code works, but you want to try a different version — a new payment provider, a faster query, or a different AI model." 185:30
| Benefit | Why |
|---|---|
| Low risk | Bad version hits 10% of users, not 100% |
| Real data for free | Inngest already tracks duration, failure rate, cost per run |
| Decide on facts | Metrics in the dashboard, not guesses |
| Easy to dial up | Just change two values — 10/90 → 50/50 |
👤 Profile & Account Deletion
Profile screen shows account details, logout, delete account, and a rate-app button. Built from two attached design images (before/after scroll) with the verify loop. 192:00
⚖️ Legal Pages + Cloudflare
Privacy policy, terms of service, and support page are "not optional — you have to have them to deploy to the App Store." 193:50
Mockups with shots.so
"For beautiful mockup images, visit shots.so — free tier is enough." Select a template (iPhone 17), white/transparent background, upload your simulator screenshots, export. Then put them in a legal/ folder. 195:00
Building the landing page
Privacy + Terms prompts
Project-agnostic prompts (provided as links) generate the full legal text. "Claude can't put your legal entity, contact address, or minimum age — you'll see placeholders to update." 203:20
Deploy to Cloudflare Workers
🍎 App Store Tips
Throughout the course, the instructor drops App Store requirements you must know before deploying. 2:40
- Delete account is mandatory — Apple rejects apps without it.
- Privacy policy + terms of service + support page are mandatory — build them (Cloudflare is free).
- Rate limiting — add a daily cap (e.g. 20 generations/user/day) so you don't blow your OpenAI budget.
- Unsplash attribution — required when using free images.
- Permission prompts — e.g. gallery access ("Allow Triply to access your photos so you can set a custom cover image") — declare it in app.json.
🚑 Errors Encountered & Fixes
The course is honest about things breaking. Here's the complete troubleshooting log — a goldmine for anyone following along. 0:00
| Error | Cause | Fix |
|---|---|---|
Dev build failed on first npx expo run ios | Sentry not yet set up | Set up Sentry first |
| "Couldn't start your trip — unauthorized" | Missing Clerk secret key | Add Clerk secret key to .env, restart app |
| Trip generation failed | Missing OpenAI API key | Create key on platform.openai.com, add to .env, restart |
| Inngest dev server error on first visit | Stale cache | Restart Expo with npx expo start --clear |
| Only 1 day in a 5-day itinerary | OpenAI returning 1-day plan | "Make the output match the user's duration" |
| World image not sticking to the right | Claude hit a layout wall | Manual fix in index.tsx (set value to 58) |
| Two trips after one generation | One run failed (missing key) | Delete the failed record — won't recur after fix |
| Chat messages not in DB | Claude used a different table | Check assistant_messages (separate from chat_messages) |
🏁 The Final Challenge
The one feature left unbuilt — deliberately. 207:40
💡 Key Takeaways
- Plan first, code second. The #1 beginner mistake is jumping into coding without a plan. Spend a full day on the plan — AI can't guess what you haven't decided.
- Interview your AI. Plan mode with "you are my senior technical co-founder" makes the AI ask questions instead of guessing features.
- The verify loop is everything. Screenshot → compare to design → rebuild → repeat until ~80-90% identical, then finish manually.
- Copy-paste docs to the LLM. "As of 2026, you don't read docs — you copy them to the LLM." Used for NativeWind, Sentry, Inngest, Clerk.
- Skills give the AI domain knowledge. Clerk skills, Context7, and agents.md all pre-load knowledge so Claude doesn't hallucinate APIs.
- AI code review catches what Claude missed. CodeRabbit found issues Claude couldn't see by default — "a different senior engineer with a security mindset."
- Feature branches + PRs, even solo. This is the "real company" workflow, and it's what makes the 2-week launch possible.
- Webhooks are non-negotiable. The Clerk → Neon user sync is the concept "you must know" as an AI/vibe coder.
- Observability from day one. Sentry logs, traces, replays, and AI-agent monitoring turn "users deleting the app" into actionable data.
- Ship with experiments. Inngest's 90/10 model routing lets you test a new AI model on 10% of users risk-free.
- App Store compliance is a feature, not an afterthought. Delete account, legal pages, attribution, rate limits — all built-in, not bolted on.
- Know the fundamentals, use AI for speed. "Learn how to use AI while still knowing the fundamentals" — you still need to jump into code to finish the last 20%.